


ਕਿਵੇਂ ਠੀਕ ਕਰੀਏ: "ਆਈਫੋਨ ਅੱਪਡੇਟ ਨਹੀਂ ਹੋ ਸਕਿਆ। ਇੱਕ ਅਣਜਾਣ ਗਲਤੀ ਹੋਈ (7)"?
ਆਈਫੋਨ ਸੁਰੱਖਿਅਤ, ਤੇਜ਼ ਅਤੇ ਭਰੋਸੇਮੰਦ ਰਹਿਣ ਲਈ ਨਿਰਵਿਘਨ ਸਾਫਟਵੇਅਰ ਅੱਪਡੇਟਾਂ 'ਤੇ ਨਿਰਭਰ ਕਰਦੇ ਹਨ, ਭਾਵੇਂ ਇਹ ਹਵਾ ਰਾਹੀਂ ਕੀਤੇ ਜਾਣ ਜਾਂ ਫਾਈਂਡਰ/ਆਈਟਿਊਨਜ਼ ਰਾਹੀਂ। ਹਾਲਾਂਕਿ, ਅੱਪਡੇਟ ਸਮੱਸਿਆਵਾਂ ਅਜੇ ਵੀ ਸਾਫਟਵੇਅਰ ਟਕਰਾਅ, ਹਾਰਡਵੇਅਰ ਸਮੱਸਿਆਵਾਂ, ਸਰਵਰ ਗਲਤੀਆਂ, ਜਾਂ ਖਰਾਬ ਫਰਮਵੇਅਰ ਕਾਰਨ ਹੋ ਸਕਦੀਆਂ ਹਨ।
"ਆਈਫੋਨ ਅੱਪਡੇਟ ਨਹੀਂ ਹੋ ਸਕਿਆ। ਇੱਕ ਅਣਜਾਣ ਗਲਤੀ ਆਈ (7)" ਸੁਨੇਹਾ ਉਦੋਂ ਪ੍ਰਗਟ ਹੁੰਦਾ ਹੈ ਜਦੋਂ ਡਿਵਾਈਸ ਪੁਸ਼ਟੀਕਰਨ ਜਾਂ ਇੰਸਟਾਲੇਸ਼ਨ ਪ੍ਰਕਿਰਿਆ ਨੂੰ ਪੂਰਾ ਨਹੀਂ ਕਰ ਸਕਦੀ। ਕੁਝ ਉਪਭੋਗਤਾ "ਆਈਫੋਨ '[ਡਿਵਾਈਸ ਨਾਮ]' ਖਾਤਾ ਅੱਪਡੇਟ ਨਹੀਂ ਕਰ ਸਕਿਆ," ਖਾਸ ਕਰਕੇ ਰੀਸਟੋਰ ਦੌਰਾਨ ਵੀ ਦੇਖ ਸਕਦੇ ਹਨ। ਦੋਵੇਂ ਸੁਨੇਹੇ ਇੱਕੋ ਸਮੱਸਿਆ ਨੂੰ ਦਰਸਾਉਂਦੇ ਹਨ—ਕੁਝ ਫਰਮਵੇਅਰ ਇੰਸਟਾਲੇਸ਼ਨ ਵਿੱਚ ਵਿਘਨ ਪਾ ਰਿਹਾ ਹੈ।
ਚੰਗੀ ਖ਼ਬਰ ਇਹ ਹੈ ਕਿ ਸਮੱਸਿਆ ਨੂੰ ਅਕਸਰ ਘਰ ਬੈਠੇ ਹੀ ਬਿਨਾਂ ਡਾਟਾ ਗੁਆਏ ਹੱਲ ਕੀਤਾ ਜਾ ਸਕਦਾ ਹੈ। ਸਹੀ ਕਦਮਾਂ ਨਾਲ—ਸਧਾਰਨ ਕਨੈਕਸ਼ਨ ਜਾਂਚਾਂ ਤੋਂ ਲੈ ਕੇ ਉੱਨਤ ਮੁਰੰਮਤ ਸਾਧਨਾਂ ਤੱਕ—ਤੁਸੀਂ ਆਪਣੀ ਡਿਵਾਈਸ ਨੂੰ ਰੀਸਟੋਰ ਕਰ ਸਕਦੇ ਹੋ ਅਤੇ ਅੱਪਡੇਟ ਨੂੰ ਸਫਲਤਾਪੂਰਵਕ ਪੂਰਾ ਕਰ ਸਕਦੇ ਹੋ।
1. "ਆਈਫੋਨ ਖਾਤਾ ਅੱਪਡੇਟ ਨਹੀਂ ਕਰ ਸਕਿਆ। ਇੱਕ ਅਣਜਾਣ ਗਲਤੀ ਹੋਈ (7)" ਕਿਉਂ ਹੁੰਦੀ ਹੈ?
ਹਾਲਾਂਕਿ ਐਪਲ ਅਧਿਕਾਰਤ ਤੌਰ 'ਤੇ ਗਲਤੀ (7) ਨੂੰ ਵਿਸਥਾਰ ਵਿੱਚ ਦਸਤਾਵੇਜ਼ੀ ਰੂਪ ਵਿੱਚ ਨਹੀਂ ਦਰਸਾਉਂਦਾ ਹੈ, ਪਰ ਸਮੱਸਿਆ ਆਮ ਤੌਰ 'ਤੇ ਹੇਠ ਲਿਖਿਆਂ ਵਿੱਚੋਂ ਇੱਕ ਤੋਂ ਆਉਂਦੀ ਹੈ:
- USB ਜਾਂ ਕਨੈਕਸ਼ਨ ਸਮੱਸਿਆਵਾਂ — ਅੱਪਡੇਟ ਦੌਰਾਨ ਇੱਕ ਨੁਕਸਦਾਰ ਲਾਈਟਨਿੰਗ ਕੇਬਲ ਜਾਂ ਅਸਥਿਰ USB ਪੋਰਟ ਸੰਚਾਰ ਵਿੱਚ ਵਿਘਨ ਪਾਉਂਦਾ ਹੈ।
- ਪੁਰਾਣਾ ਫਾਈਂਡਰ/iTunes ਜਾਂ macOS/Windows ਕੰਪੋਨੈਂਟ — ਪੁਰਾਣਾ ਸਾਫਟਵੇਅਰ ਨਵੇਂ iOS ਫਰਮਵੇਅਰ ਦੀ ਸਹੀ ਤਰ੍ਹਾਂ ਪੁਸ਼ਟੀ ਜਾਂ ਇੰਸਟਾਲ ਨਹੀਂ ਕਰ ਸਕਦਾ।
- ਖਰਾਬ ਜਾਂ ਅਧੂਰੀਆਂ ਫਰਮਵੇਅਰ ਫਾਈਲਾਂ (IPSW) — ਖਰਾਬ ਡਾਊਨਲੋਡ ਅੱਪਡੇਟ ਨੂੰ ਪੂਰਾ ਹੋਣ ਤੋਂ ਰੋਕਦਾ ਹੈ।
- ਆਈਫੋਨ 'ਤੇ ਲੋੜੀਂਦੀ ਸਟੋਰੇਜ ਨਹੀਂ ਹੈ — ਡਿਵਾਈਸ ਨੂੰ ਅੱਪਡੇਟ ਨੂੰ ਅਨਪੈਕ ਕਰਨ ਅਤੇ ਇੰਸਟਾਲ ਕਰਨ ਲਈ ਕਈ ਗੀਗਾਬਾਈਟ ਖਾਲੀ ਥਾਂ ਦੀ ਲੋੜ ਹੈ।
- ਸਿਸਟਮ-ਪੱਧਰ ਦੇ ਟਕਰਾਅ ਜਾਂ ਸਾਫਟਵੇਅਰ ਭ੍ਰਿਸ਼ਟਾਚਾਰ — ਖਰਾਬ iOS ਕੰਪੋਨੈਂਟ ਅੱਪਡੇਟ ਨੂੰ ਸ਼ੁਰੂ ਜਾਂ ਖਤਮ ਹੋਣ ਤੋਂ ਰੋਕ ਸਕਦੇ ਹਨ।
- ਹਾਰਡਵੇਅਰ ਸਮੱਸਿਆਵਾਂ (ਬਹੁਤ ਘੱਟ) — ਸਟੋਰੇਜ ਚਿਪਸ ਜਾਂ ਲਾਜਿਕ ਬੋਰਡ ਨਾਲ ਸਮੱਸਿਆਵਾਂ ਵਾਰ-ਵਾਰ ਗਲਤੀ (7) ਪੈਦਾ ਕਰ ਸਕਦੀਆਂ ਹਨ।
ਭਾਵੇਂ ਕਾਰਨ ਵੱਖੋ-ਵੱਖਰਾ ਹੁੰਦਾ ਹੈ, ਪਰ ਚੰਗੀ ਖ਼ਬਰ ਇਹ ਹੈ ਕਿ ਜ਼ਿਆਦਾਤਰ ਮਾਮਲਿਆਂ ਨੂੰ ਘਰ ਵਿੱਚ ਹੀ ਠੀਕ ਕੀਤਾ ਜਾ ਸਕਦਾ ਹੈ।
2. ਕਿਵੇਂ ਠੀਕ ਕਰੀਏ: "ਆਈਫੋਨ ਅੱਪਡੇਟ ਨਹੀਂ ਹੋ ਸਕਿਆ। ਇੱਕ ਅਣਜਾਣ ਗਲਤੀ ਹੋਈ (7)"?
ਹੇਠਾਂ ਸਭ ਤੋਂ ਪ੍ਰਭਾਵਸ਼ਾਲੀ ਹੱਲ ਦਿੱਤੇ ਗਏ ਹਨ, ਤੇਜ਼ ਸੁਧਾਰਾਂ ਨਾਲ ਸ਼ੁਰੂ ਕਰਦੇ ਹੋਏ ਅਤੇ ਡੂੰਘੇ ਮੁਰੰਮਤ ਦੇ ਕਦਮਾਂ ਵੱਲ ਵਧਦੇ ਹੋਏ।
2.1 ਆਈਫੋਨ ਅਤੇ ਕੰਪਿਊਟਰ ਦੋਵਾਂ ਨੂੰ ਰੀਸਟਾਰਟ ਕਰੋ
ਇੱਕ ਸਧਾਰਨ ਰੀਸਟਾਰਟ ਅਸਥਾਈ ਸੌਫਟਵੇਅਰ ਗਲਤੀਆਂ ਅਤੇ ਕਨੈਕਸ਼ਨ ਟਕਰਾਵਾਂ ਨੂੰ ਦੂਰ ਕਰਦਾ ਹੈ।
- ਆਪਣੇ ਆਈਫੋਨ ਨੂੰ ਪੂਰੀ ਤਰ੍ਹਾਂ ਬੰਦ ਕਰੋ
- ਆਪਣੇ ਮੈਕ ਜਾਂ ਵਿੰਡੋਜ਼ ਪੀਸੀ ਨੂੰ ਰੀਸਟਾਰਟ ਕਰੋ
- ਅੱਪਡੇਟ ਦੁਬਾਰਾ ਅਜ਼ਮਾਓ।
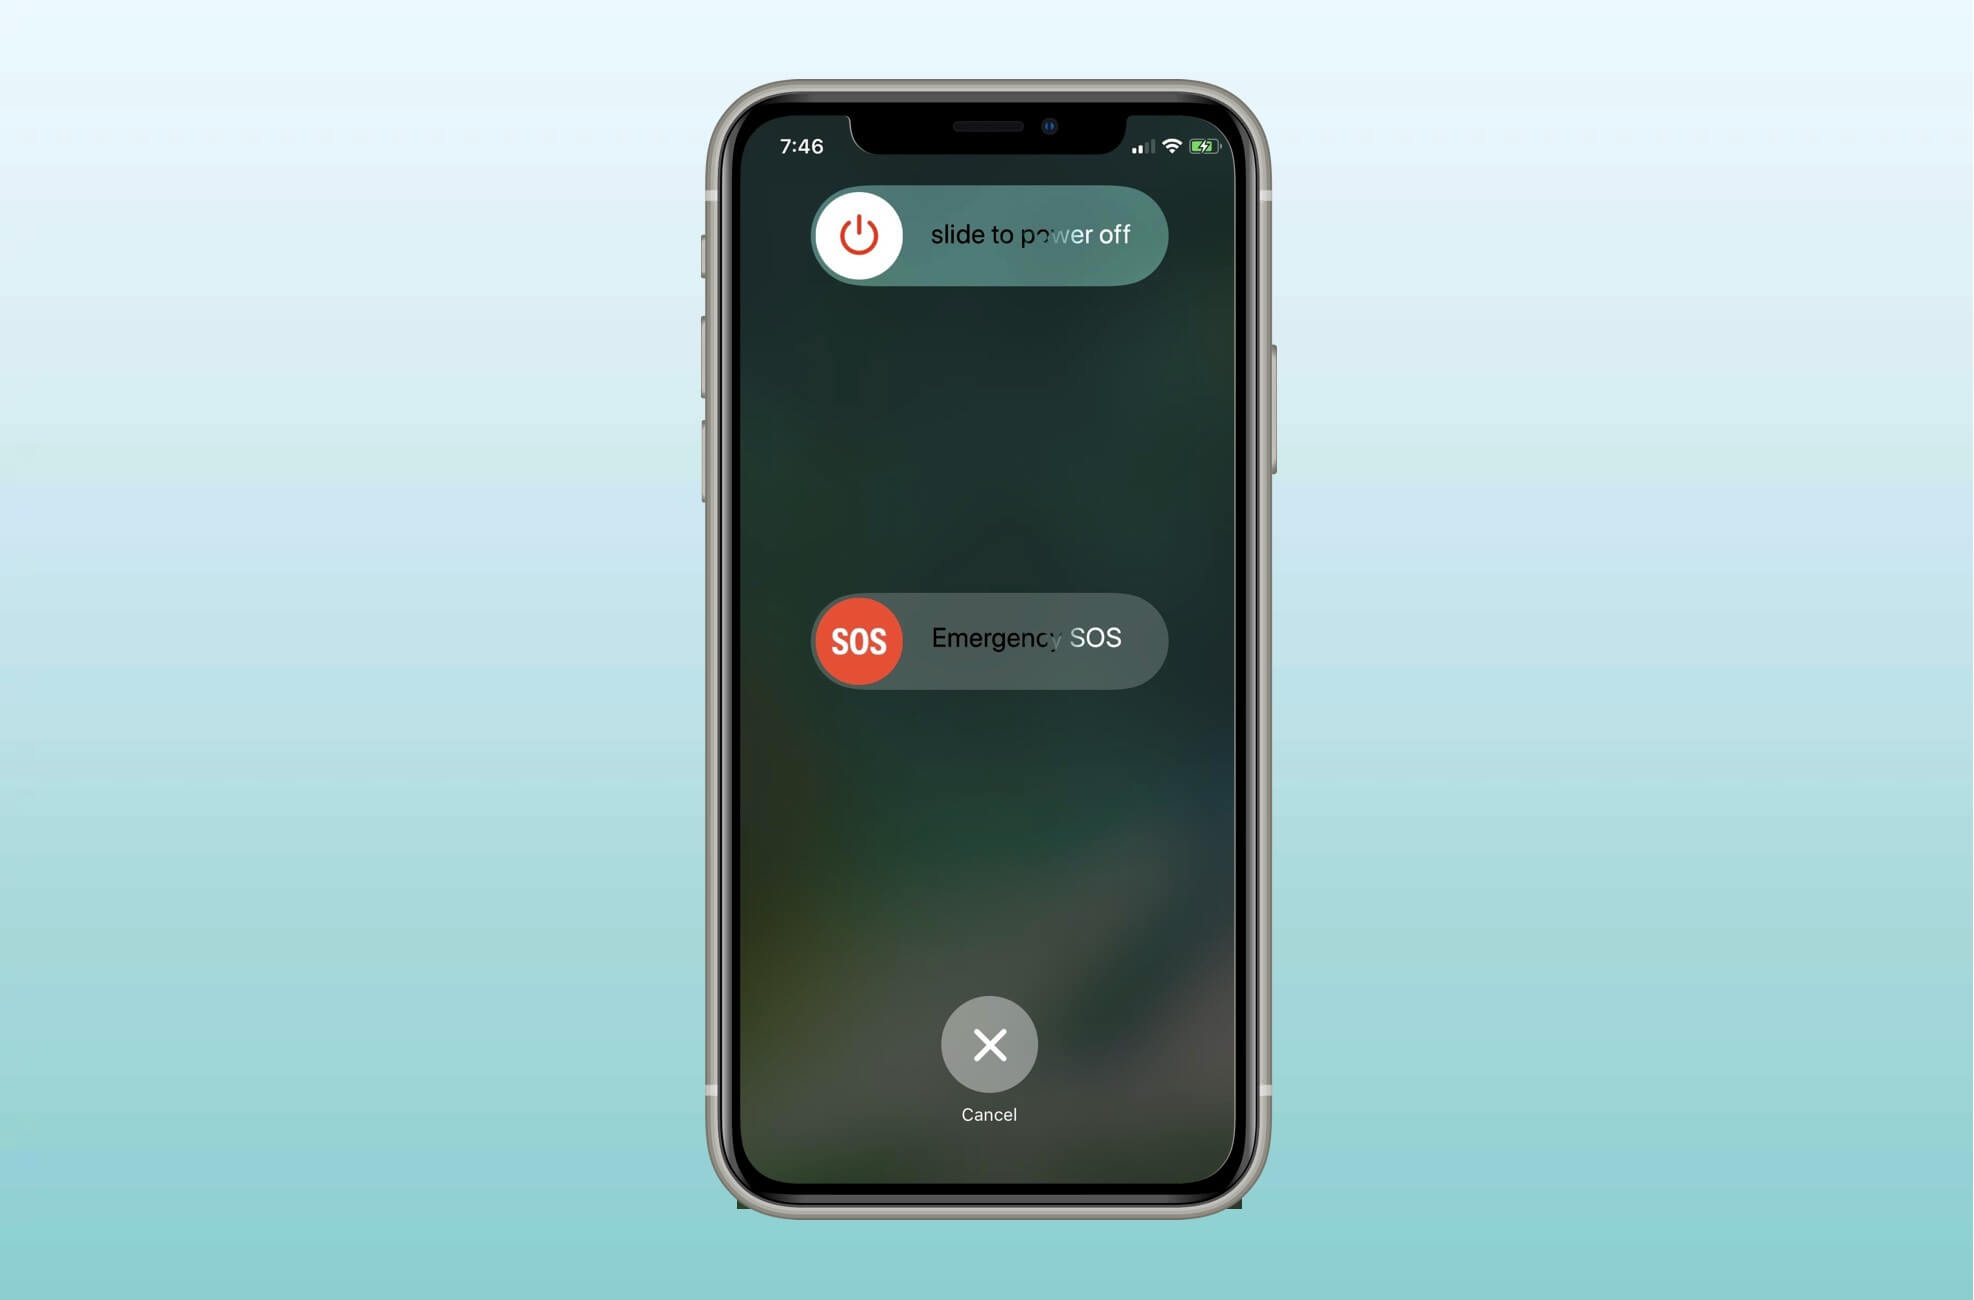
ਜੇਕਰ ਗਲਤੀ ਅੱਪਡੇਟ ਪ੍ਰਕਿਰਿਆ ਦੇ ਸ਼ੁਰੂ ਵਿੱਚ ਹੁੰਦੀ ਹੈ, ਤਾਂ ਅਕਸਰ ਰੀਸਟਾਰਟ ਕਰਨ ਨਾਲ ਇਸਨੂੰ ਹੱਲ ਕੀਤਾ ਜਾਂਦਾ ਹੈ।
2.2 ਆਪਣੀ ਲਾਈਟਨਿੰਗ ਕੇਬਲ ਅਤੇ USB ਪੋਰਟ ਦੀ ਜਾਂਚ ਕਰੋ
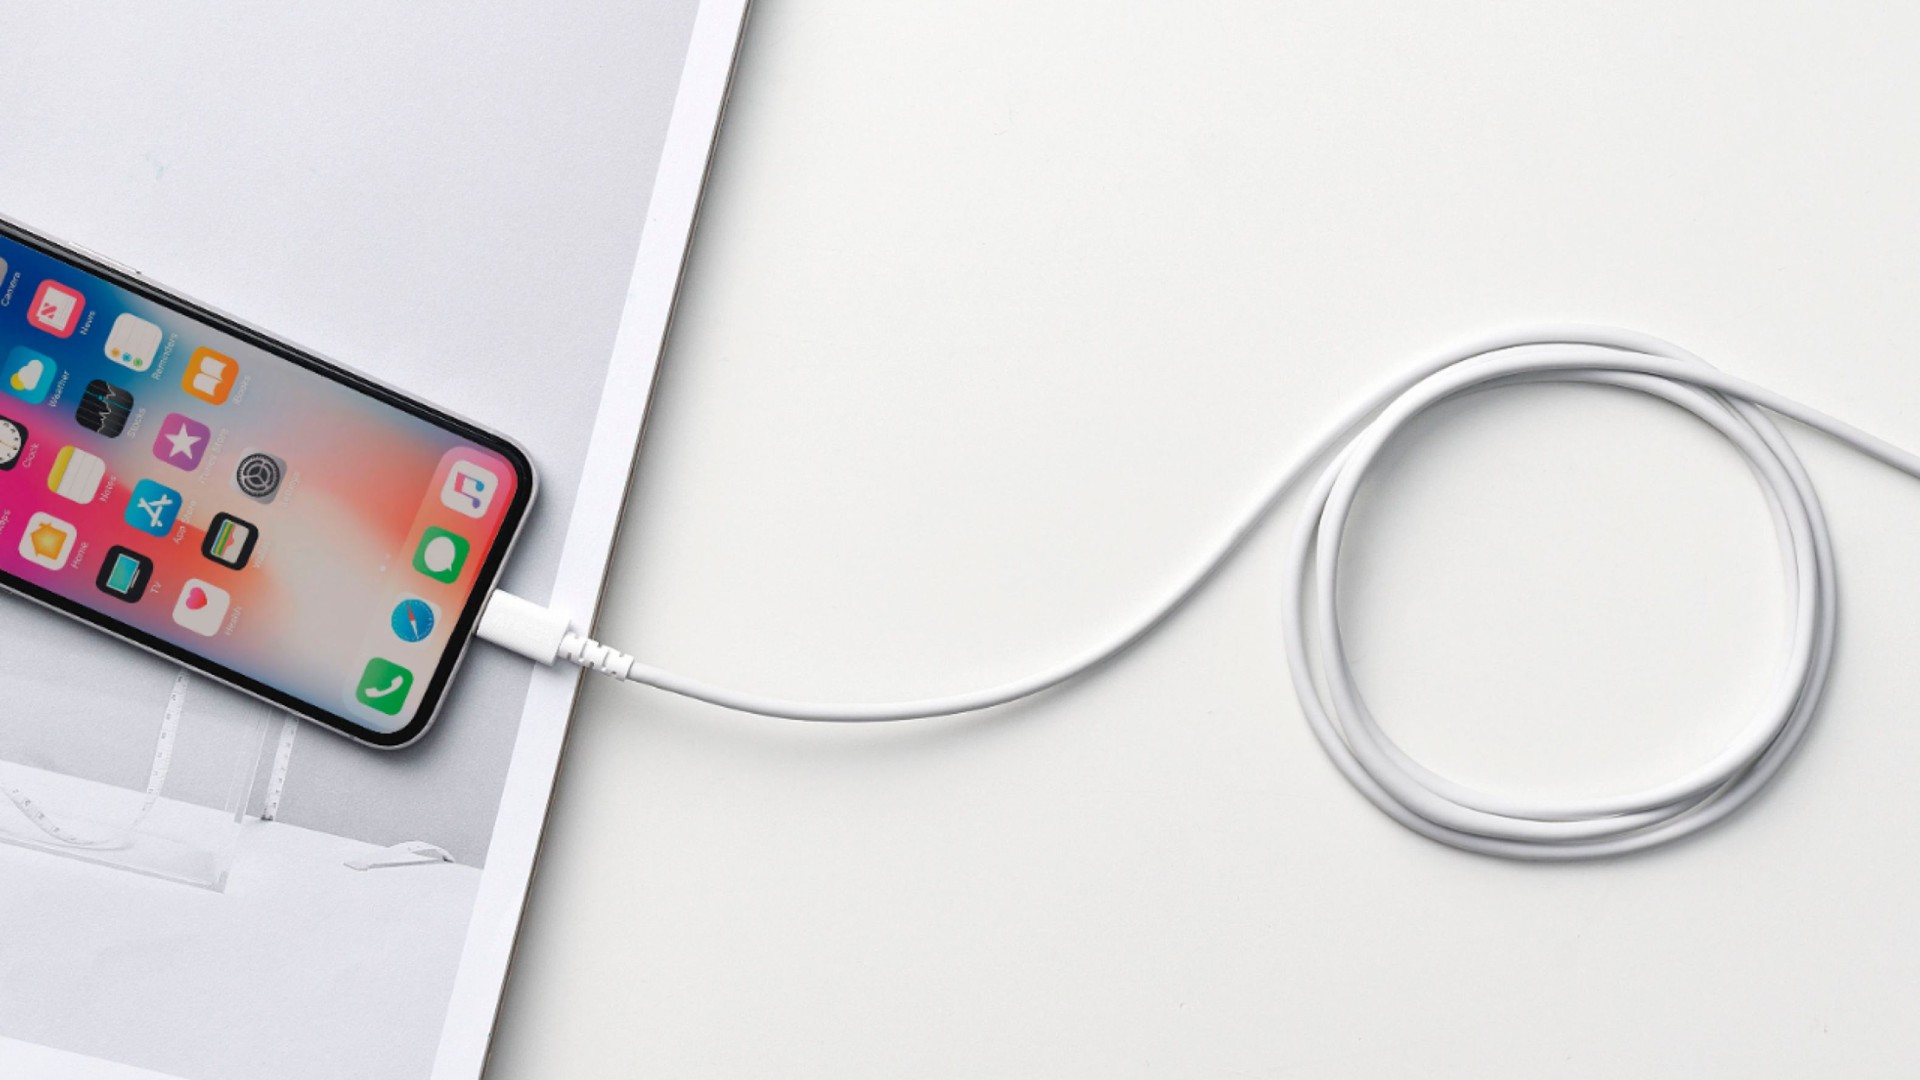
ਕੰਪਿਊਟਰ ਰਾਹੀਂ ਅੱਪਡੇਟ ਕਰਦੇ ਸਮੇਂ ਇੱਕ ਸਥਿਰ ਕਨੈਕਸ਼ਨ ਜ਼ਰੂਰੀ ਹੈ। ਜੇਕਰ ਕਨੈਕਸ਼ਨ ਇੱਕ ਸਕਿੰਟ ਲਈ ਵੀ ਟੁੱਟ ਜਾਂਦਾ ਹੈ, ਤਾਂ ਅੱਪਡੇਟ ਅਸਫਲ ਹੋ ਜਾਂਦਾ ਹੈ ਅਤੇ ਗਲਤੀ (7) ਦਿਖਾਈ ਦੇ ਸਕਦੀ ਹੈ।
ਹੇਠ ਲਿਖੇ ਕੰਮ ਕਰੋ:
- ਅਸਲੀ ਐਪਲ ਲਾਈਟਨਿੰਗ ਕੇਬਲ ਜਾਂ MFi-ਪ੍ਰਮਾਣਿਤ ਕੇਬਲ ਦੀ ਵਰਤੋਂ ਕਰੋ।
- USB ਹੱਬਾਂ ਤੋਂ ਬਚੋ—ਸਿੱਧਾ ਕੰਪਿਊਟਰ ਵਿੱਚ ਪਲੱਗ ਲਗਾਓ।
- ਇੱਕ ਵੱਖਰਾ USB ਪੋਰਟ ਅਜ਼ਮਾਓ।
- ਜੇਕਰ ਉਪਲਬਧ ਹੋਵੇ ਤਾਂ ਕੋਈ ਹੋਰ ਕੰਪਿਊਟਰ ਅਜ਼ਮਾਓ।
ਇਹ ਸਭ ਤੋਂ ਆਮ ਅਤੇ ਅਣਦੇਖੇ ਕਾਰਨਾਂ ਵਿੱਚੋਂ ਇੱਕ ਹੈ।
2.3 ਮੈਕ, ਵਿੰਡੋਜ਼, ਜਾਂ ਆਈਟਿਊਨਜ਼/ਫਾਈਂਡਰ ਨੂੰ ਅੱਪਡੇਟ ਕਰੋ
ਤੁਹਾਡੇ ਕੰਪਿਊਟਰ ਦੇ ਸਾਫਟਵੇਅਰ ਅਤੇ ਨਵੀਨਤਮ iOS ਫਰਮਵੇਅਰ ਵਿਚਕਾਰ ਅਨੁਕੂਲਤਾ ਸਮੱਸਿਆਵਾਂ ਗਲਤੀ ਨੂੰ ਟਰਿੱਗਰ ਕਰ ਸਕਦੀਆਂ ਹਨ।
macOS 'ਤੇ:
'ਤੇ ਜਾਓ ਸਿਸਟਮ ਸੈਟਿੰਗਾਂ → ਜਨਰਲ → ਸਾਫਟਵੇਅਰ ਅੱਪਡੇਟ ਅਤੇ ਸਾਰੇ ਉਪਲਬਧ ਅੱਪਡੇਟ ਸਥਾਪਤ ਕਰੋ।
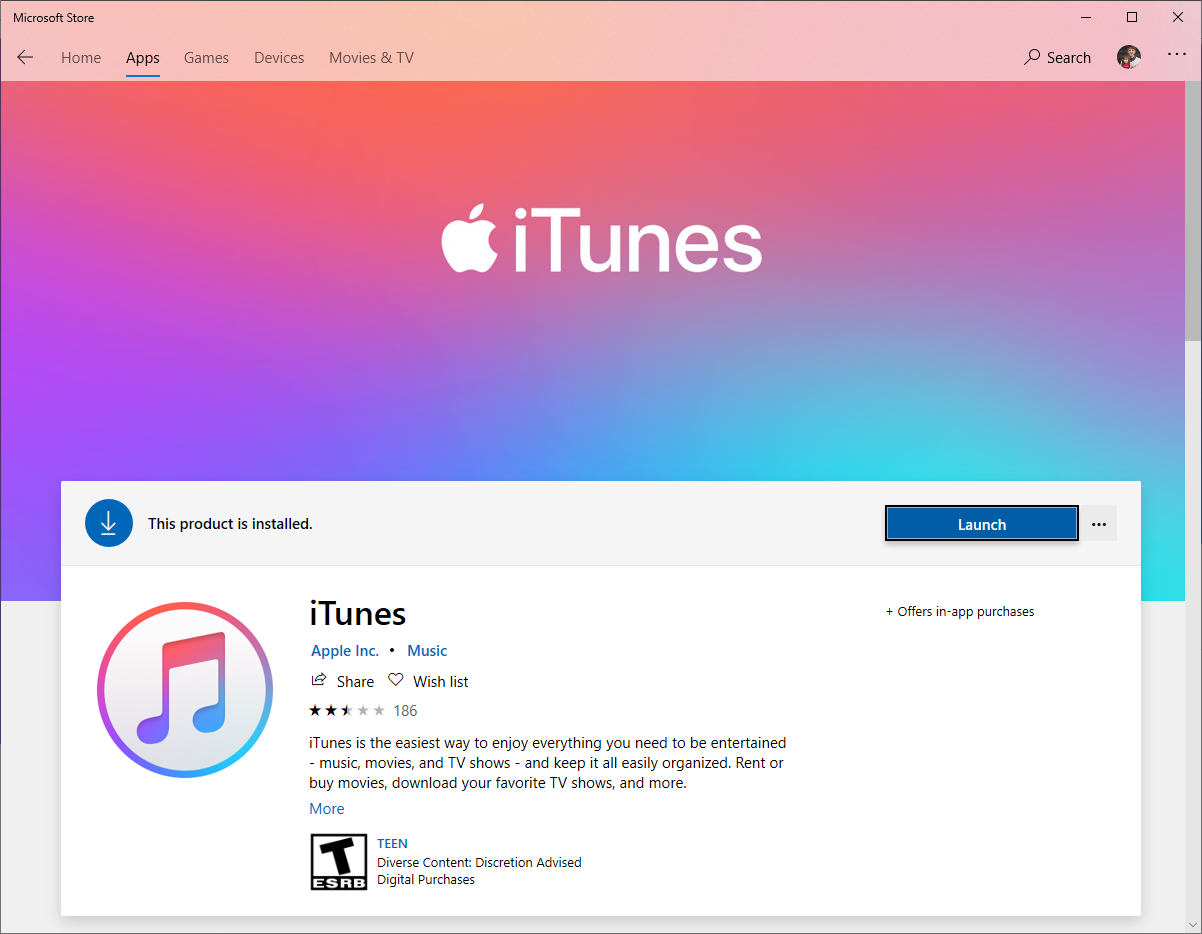
ਵਿੰਡੋਜ਼ 'ਤੇ
- ਮਾਈਕ੍ਰੋਸਾਫਟ ਸਟੋਰ ਰਾਹੀਂ iTunes ਨੂੰ ਅੱਪਡੇਟ ਕਰੋ
- ਯਕੀਨੀ ਬਣਾਓ ਕਿ ਐਪਲ ਮੋਬਾਈਲ ਡਿਵਾਈਸ USB ਡਰਾਈਵਰ ਸਥਾਪਤ ਹੈ।
- ਜੇਕਰ ਜ਼ਰੂਰੀ ਹੋਵੇ ਤਾਂ ਐਪਲ ਦੇ ਸਪੋਰਟ ਸਾਫਟਵੇਅਰ ਨੂੰ ਦੁਬਾਰਾ ਸਥਾਪਿਤ ਕਰੋ।
ਇੱਕ ਵਾਰ ਕੰਪਿਊਟਰ ਸਾਫਟਵੇਅਰ ਪੂਰੀ ਤਰ੍ਹਾਂ ਅੱਪਡੇਟ ਹੋ ਜਾਣ ਤੋਂ ਬਾਅਦ, iOS ਅੱਪਡੇਟ ਨੂੰ ਦੁਬਾਰਾ ਅਜ਼ਮਾਓ।
2.4 ਆਈਫੋਨ 'ਤੇ ਸਟੋਰੇਜ ਸਪੇਸ ਖਾਲੀ ਕਰੋ
ਐਪਲ ਦੀ ਅੱਪਡੇਟ ਪ੍ਰਕਿਰਿਆ ਨੂੰ ਫਰਮਵੇਅਰ ਨੂੰ ਅਨਪੈਕ ਕਰਨ ਲਈ ਮੁਫ਼ਤ ਸਟੋਰੇਜ ਦੀ ਲੋੜ ਹੁੰਦੀ ਹੈ। ਜੇਕਰ ਤੁਹਾਡਾ ਆਈਫੋਨ ਲਗਭਗ ਭਰਿਆ ਹੋਇਆ ਹੈ, ਤਾਂ ਪੁਸ਼ਟੀਕਰਨ ਦੌਰਾਨ ਅੱਪਡੇਟ ਅਸਫਲ ਹੋ ਸਕਦਾ ਹੈ।
'ਤੇ ਜਾਓ ਸੈਟਿੰਗਾਂ → ਜਨਰਲ → ਆਈਫੋਨ ਸਟੋਰੇਜ ਅਤੇ ਘੱਟੋ ਘੱਟ ਖਾਲੀ ਕਰੋ 5-10 ਜੀ.ਬੀ. ਦੁਬਾਰਾ ਕੋਸ਼ਿਸ਼ ਕਰਨ ਤੋਂ ਪਹਿਲਾਂ।
ਰਿਕਵਰੀ ਮੋਡ ਡਿਵਾਈਸ ਨੂੰ ਅੱਪਡੇਟ ਨੂੰ ਮੁੜ ਸਥਾਪਿਤ ਕਰਨ ਲਈ ਮਜਬੂਰ ਕਰਦਾ ਹੈ ਅਤੇ ਅਕਸਰ ਸਿਸਟਮ-ਪੱਧਰ ਦੇ ਟਕਰਾਵਾਂ ਨੂੰ ਦੂਰ ਕਰਨ ਲਈ ਪ੍ਰਭਾਵਸ਼ਾਲੀ ਹੁੰਦਾ ਹੈ।

2.5 ਆਈਫੋਨ ਨੂੰ ਰਿਕਵਰੀ ਮੋਡ ਵਿੱਚ ਪਾਓ ਅਤੇ ਅੱਪਡੇਟ ਕਰੋ
ਰਿਕਵਰੀ ਮੋਡ ਵਿੱਚ ਕਿਵੇਂ ਦਾਖਲ ਹੋਣਾ ਹੈ:
ਚਾਲੂ ਆਈਫੋਨ 8+ , ਵੌਲਯੂਮ ਵਧਾਓ, ਫਿਰ ਵੌਲਯੂਮ ਘਟਾਓ, ਅਤੇ ਸਾਈਡ; ਨੂੰ ਦਬਾ ਕੇ ਰੱਖੋ ਆਈਫੋਨ 7 , ਵਾਲੀਅਮ ਡਾਊਨ + ਸਾਈਡ; ਨੂੰ ਚਾਲੂ ਰੱਖੋ ਆਈਫੋਨ 6s ਜਾਂ ਇਸ ਤੋਂ ਪਹਿਲਾਂ ਵਾਲੇ , ਹੋਮ + ਪਾਵਰ ਦਬਾ ਕੇ ਰੱਖੋ।
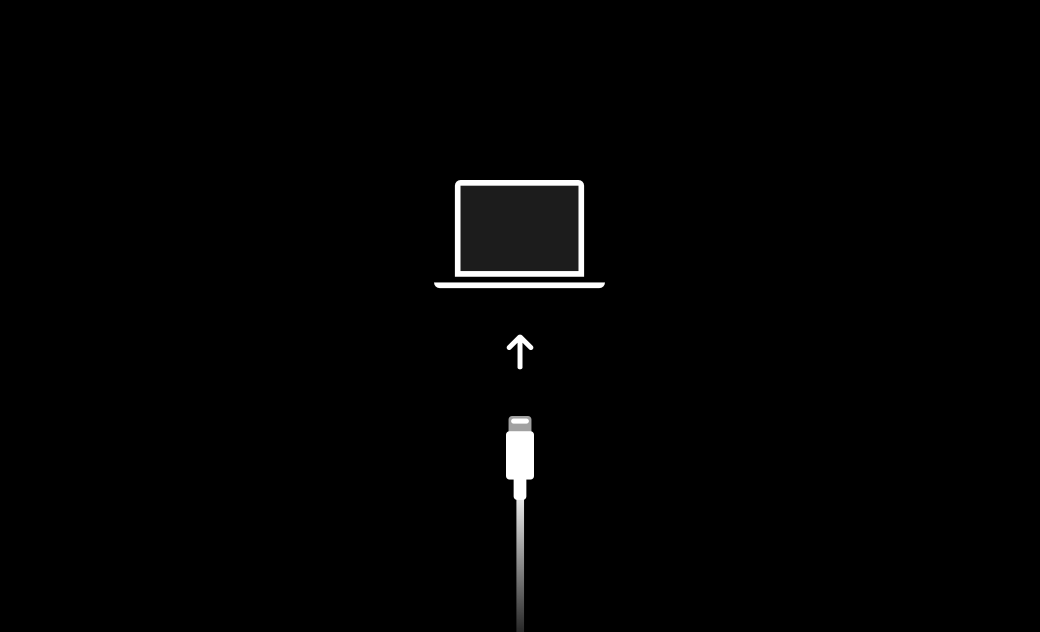
ਰਿਕਵਰੀ ਮੋਡ ਸਕ੍ਰੀਨ ਦਿਖਾਈ ਦੇਣ ਤੱਕ ਦਬਾ ਕੇ ਰੱਖੋ।
ਫਿਰ ਚੁਣੋ
ਅੱਪਡੇਟ ਕਰੋ
ਜਦੋਂ ਫਾਈਂਡਰ ਜਾਂ ਆਈਟਿਊਨਸ ਤੁਹਾਨੂੰ ਪੁੱਛਦਾ ਹੈ।
ਜੇਕਰ "ਅੱਪਡੇਟ" ਅਸਫਲ ਹੋ ਜਾਂਦਾ ਹੈ, ਤਾਂ ਤੁਸੀਂ ਪ੍ਰਕਿਰਿਆ ਨੂੰ ਦੁਹਰਾ ਸਕਦੇ ਹੋ ਅਤੇ ਚੁਣ ਸਕਦੇ ਹੋ ਰੀਸਟੋਰ ਕਰੋ , ਹਾਲਾਂਕਿ ਰੀਸਟੋਰ ਤੁਹਾਡੀ ਡਿਵਾਈਸ ਨੂੰ ਮਿਟਾ ਦੇਵੇਗਾ।
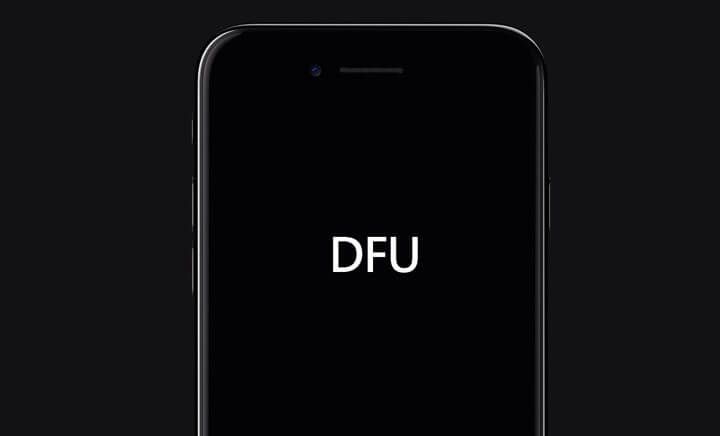
2.6 DFU ਮੋਡ ਰੀਸਟੋਰ ਦੀ ਕੋਸ਼ਿਸ਼ ਕਰੋ
DFU (ਡਿਵਾਈਸ ਫਰਮਵੇਅਰ ਅੱਪਡੇਟ) ਮੋਡ ਰਿਕਵਰੀ ਮੋਡ ਨਾਲੋਂ ਡੂੰਘਾ ਹੈ ਅਤੇ ਭ੍ਰਿਸ਼ਟਾਚਾਰ ਨੂੰ ਠੀਕ ਕਰ ਸਕਦਾ ਹੈ ਜੋ ਆਮ ਰੀਸਟੋਰ ਨਹੀਂ ਕਰ ਸਕਦੇ।
DFU ਮੋਡ ਸਿੱਧੇ ਫਰਮਵੇਅਰ ਅਤੇ ਬੂਟਲੋਡਰ ਨੂੰ ਮੁੜ ਸਥਾਪਿਤ ਕਰਦਾ ਹੈ, ਇਸਨੂੰ ਜ਼ਿੱਦੀ ਗਲਤੀਆਂ ਦੇ ਵਿਰੁੱਧ ਪ੍ਰਭਾਵਸ਼ਾਲੀ ਬਣਾਉਂਦਾ ਹੈ, ਜਿਸ ਵਿੱਚ ਗਲਤੀ (7) ਵੀ ਸ਼ਾਮਲ ਹੈ।
2.7 IPSW ਫਰਮਵੇਅਰ ਫਾਈਲ ਨੂੰ ਮਿਟਾਓ ਅਤੇ ਦੁਬਾਰਾ ਡਾਊਨਲੋਡ ਕਰੋ
ਜੇਕਰ ਡਾਊਨਲੋਡ ਕੀਤੀ ਫਰਮਵੇਅਰ ਫਾਈਲ ਖਰਾਬ ਹੈ, ਤਾਂ ਫਾਈਂਡਰ/ਆਈਟਿਊਨਸ ਅੱਪਡੇਟ ਨੂੰ ਪੂਰਾ ਨਹੀਂ ਕਰ ਸਕਦਾ।
macOS 'ਤੇ:
ਫਰਮਵੇਅਰ ਨੂੰ ਇਸ ਤੋਂ ਮਿਟਾਓ:
~/Library/iTunes/iPhone Software Updates/
ਵਿੰਡੋਜ਼ 'ਤੇ:
ਇਸ ਤੋਂ ਮਿਟਾਓ:
C:\Users\[YourName]\AppData\Roaming\Apple Computer\iTunes\iPhone Software Updates
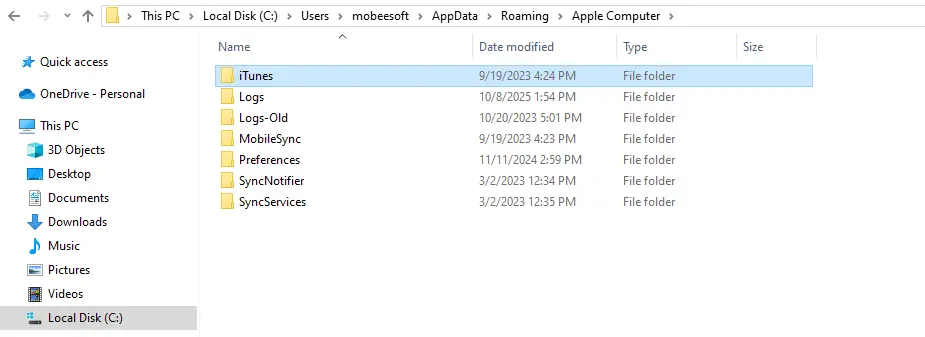
IPSW ਨੂੰ ਮਿਟਾਉਣ ਤੋਂ ਬਾਅਦ, ਅੱਪਡੇਟ ਨੂੰ ਦੁਬਾਰਾ ਅਜ਼ਮਾਓ ਤਾਂ ਜੋ ਕੰਪਿਊਟਰ ਇੱਕ ਨਵੀਂ ਕਾਪੀ ਡਾਊਨਲੋਡ ਕਰ ਸਕੇ।
3. ਐਡਵਾਂਸਡ ਫਿਕਸ: ਗਲਤੀ (7) ਨੂੰ ਠੀਕ ਕਰਨ ਲਈ AimerLab FixMate ਦੀ ਵਰਤੋਂ ਕਰੋ।
ਜੇਕਰ ਕੋਈ ਵੀ ਮਿਆਰੀ ਤਰੀਕਾ ਸਮੱਸਿਆ ਦਾ ਹੱਲ ਨਹੀਂ ਕਰਦਾ - ਜਾਂ ਜੇਕਰ ਤੁਸੀਂ ਇੱਕ ਤੇਜ਼, ਆਸਾਨ ਹੱਲ ਚਾਹੁੰਦੇ ਹੋ - ਤਾਂ ਇੱਕ ਉੱਨਤ ਸੰਦ ਜਿਵੇਂ ਕਿ AimerLab FixMate ਗਲਤੀ (7) ਨੂੰ ਆਪਣੇ ਆਪ ਠੀਕ ਕਰ ਸਕਦਾ ਹੈ।
ਫਿਕਸਮੇਟ 200 ਤੋਂ ਵੱਧ iOS ਸਿਸਟਮ ਸਮੱਸਿਆਵਾਂ ਨੂੰ ਹੱਲ ਕਰਨ ਵਿੱਚ ਮਾਹਰ ਹੈ, ਜਿਸ ਵਿੱਚ ਸ਼ਾਮਲ ਹਨ:
- (7), (4013), (4005), (9), ਆਦਿ ਵਰਗੀਆਂ ਗਲਤੀਆਂ ਅੱਪਡੇਟ ਕਰੋ।
- ਰਿਕਵਰੀ ਮੋਡ ਵਿੱਚ ਫਸੇ ਡਿਵਾਈਸਾਂ
- ਕਾਲੀਆਂ ਜਾਂ ਜੰਮੀਆਂ ਹੋਈਆਂ ਸਕ੍ਰੀਨਾਂ
- ਬੂਟ ਲੂਪਸ
- ਆਈਫੋਨ ਫਾਈਂਡਰ/ਆਈਟਿਊਨਸ ਨਾਲ ਕਨੈਕਟ ਨਹੀਂ ਹੋ ਰਿਹਾ ਹੈ
- ਸਿਸਟਮ ਭ੍ਰਿਸ਼ਟਾਚਾਰ
AimerLab FixMate ਦੀ ਵਰਤੋਂ ਕਰਕੇ ਗਲਤੀ (7) ਨੂੰ ਕਿਵੇਂ ਠੀਕ ਕਰੀਏ:
- ਆਪਣੇ ਵਿੰਡੋਜ਼ ਕੰਪਿਊਟਰ 'ਤੇ AimerLab FixMate ਡਾਊਨਲੋਡ ਕਰੋ ਅਤੇ ਸੈੱਟਅੱਪ ਕਰੋ।
- ਸਾਫਟਵੇਅਰ ਖੋਲ੍ਹੋ ਅਤੇ ਇੱਕ ਭਰੋਸੇਯੋਗ USB ਕੇਬਲ ਨਾਲ ਆਪਣੇ ਆਈਫੋਨ ਨਾਲ ਕਨੈਕਟ ਕਰੋ।
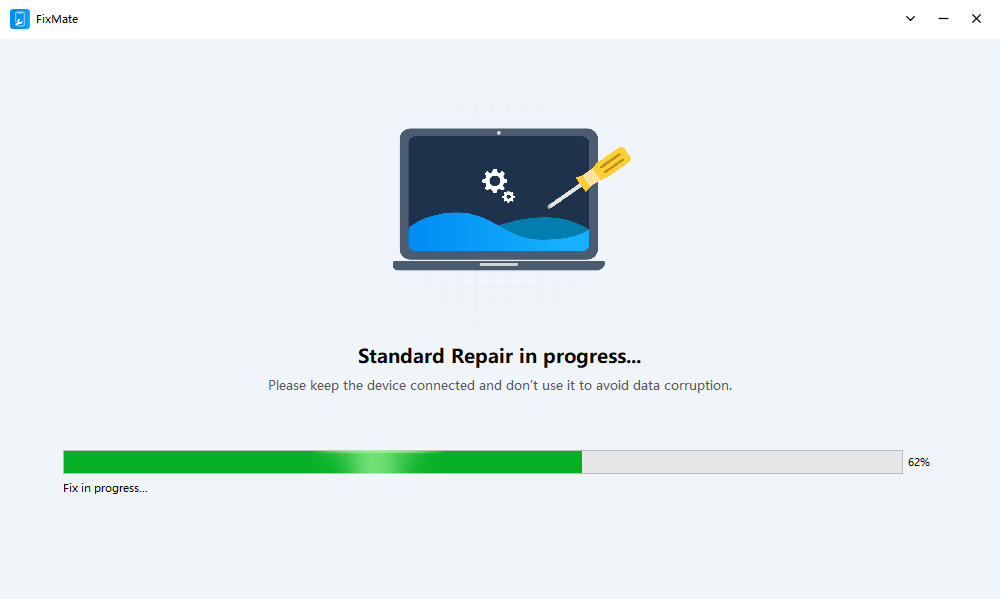
ਡਾਟਾ ਖਰਾਬ ਹੋਣ ਤੋਂ ਬਚਣ ਲਈ ਸਟੈਂਡਰਡ ਰਿਪੇਅਰ ਚੁਣੋ, ਫਿਕਸਮੇਟ ਨੂੰ ਆਪਣੇ ਆਪ ਤੁਹਾਡੇ ਡਿਵਾਈਸ ਮਾਡਲ ਦਾ ਪਤਾ ਲਗਾਉਣ ਦਿਓ। - ਸਿਫ਼ਾਰਸ਼ੀ iOS ਫਰਮਵੇਅਰ ਪੈਕੇਜ ਡਾਊਨਲੋਡ ਕਰਨ ਲਈ ਕਲਿੱਕ ਕਰੋ।
- ਮੁਰੰਮਤ ਸ਼ੁਰੂ ਕਰੋ ਦਬਾਓ ਅਤੇ ਪ੍ਰਕਿਰਿਆ ਦੇ ਖਤਮ ਹੋਣ ਦੀ ਉਡੀਕ ਕਰੋ।
4. ਸਿੱਟਾ
"ਆਈਫੋਨ ਅੱਪਡੇਟ ਨਹੀਂ ਹੋ ਸਕਿਆ। ਇੱਕ ਅਣਜਾਣ ਗਲਤੀ ਆਈ (7)" ਆਮ ਤੌਰ 'ਤੇ ਕਨੈਕਸ਼ਨ ਸਮੱਸਿਆਵਾਂ, ਪੁਰਾਣੇ ਸੌਫਟਵੇਅਰ, ਜਾਂ ਖਰਾਬ ਸਿਸਟਮ ਫਾਈਲਾਂ ਕਾਰਨ ਹੁੰਦੀ ਹੈ। ਜਦੋਂ ਕਿ ਕੇਬਲਾਂ ਦੀ ਜਾਂਚ ਕਰਨਾ, ਆਪਣੇ ਕੰਪਿਊਟਰ ਨੂੰ ਅੱਪਡੇਟ ਕਰਨਾ, ਰਿਕਵਰੀ ਮੋਡ ਦੀ ਵਰਤੋਂ ਕਰਨਾ, ਜਾਂ ਫਰਮਵੇਅਰ ਨੂੰ ਮੁੜ ਸਥਾਪਿਤ ਕਰਨਾ ਵਰਗੇ ਬੁਨਿਆਦੀ ਹੱਲ ਅਕਸਰ ਸਮੱਸਿਆ ਨੂੰ ਹੱਲ ਕਰਦੇ ਹਨ, ਕੁਝ ਮਾਮਲੇ ਮਿਆਰੀ ਤਰੀਕਿਆਂ ਲਈ ਬਹੁਤ ਜ਼ਿੱਦੀ ਹੁੰਦੇ ਹਨ।
ਇੱਕ ਤੇਜ਼, ਭਰੋਸੇਮੰਦ, ਅਤੇ ਮੁਸ਼ਕਲ ਰਹਿਤ ਮੁਰੰਮਤ ਲਈ, AimerLab FixMate ਸਭ ਤੋਂ ਪ੍ਰਭਾਵਸ਼ਾਲੀ ਹੱਲ ਪੇਸ਼ ਕਰਦਾ ਹੈ। ਇਹ ਸਿਸਟਮ ਦੀਆਂ ਗਲਤੀਆਂ ਨੂੰ ਠੀਕ ਕਰਦਾ ਹੈ, ਖਰਾਬ iOS ਹਿੱਸਿਆਂ ਦੀ ਮੁਰੰਮਤ ਕਰਦਾ ਹੈ, ਅਤੇ ਡਾਟਾ ਖਰਾਬ ਹੋਏ ਬਿਨਾਂ ਗਲਤੀ (7) ਨੂੰ ਹੱਲ ਕਰਦਾ ਹੈ, ਜਿਸ ਨਾਲ ਇਹ ਤੁਹਾਡੇ ਆਈਫੋਨ ਨੂੰ ਜਲਦੀ ਅਤੇ ਸੁਰੱਖਿਅਤ ਢੰਗ ਨਾਲ ਬਹਾਲ ਕਰਨ ਲਈ ਸਭ ਤੋਂ ਵਧੀਆ ਸਾਧਨ ਹੈ।
- ਆਈਫੋਨ 'ਤੇ ਪੋਕੇਮੋਨ ਗੋ ਨੂੰ ਕਿਵੇਂ ਧੋਖਾ ਦੇਣਾ ਹੈ?
- Aimerlab MobiGo GPS ਸਥਾਨ ਸਪੂਫਰ ਦੀ ਸੰਖੇਪ ਜਾਣਕਾਰੀ
- ਆਪਣੇ ਆਈਫੋਨ 'ਤੇ ਸਥਾਨ ਨੂੰ ਕਿਵੇਂ ਬਦਲਣਾ ਹੈ?
- ਆਈਓਐਸ ਲਈ ਚੋਟੀ ਦੇ 5 ਨਕਲੀ GPS ਸਥਾਨ ਸਪੂਫਰ
- GPS ਸਥਾਨ ਖੋਜਕਰਤਾ ਪਰਿਭਾਸ਼ਾ ਅਤੇ ਸਪੂਫਰ ਸੁਝਾਅ
- Snapchat 'ਤੇ ਆਪਣਾ ਸਥਾਨ ਕਿਵੇਂ ਬਦਲਣਾ ਹੈ
- ਆਈਓਐਸ ਡਿਵਾਈਸਾਂ 'ਤੇ ਟਿਕਾਣਾ ਕਿਵੇਂ ਲੱਭੀਏ/ਸ਼ੇਅਰ/ਓਹਲੇ ਕਰੀਏ?